USER How-TO
Applicable for "Elite" and equivalent level members only.
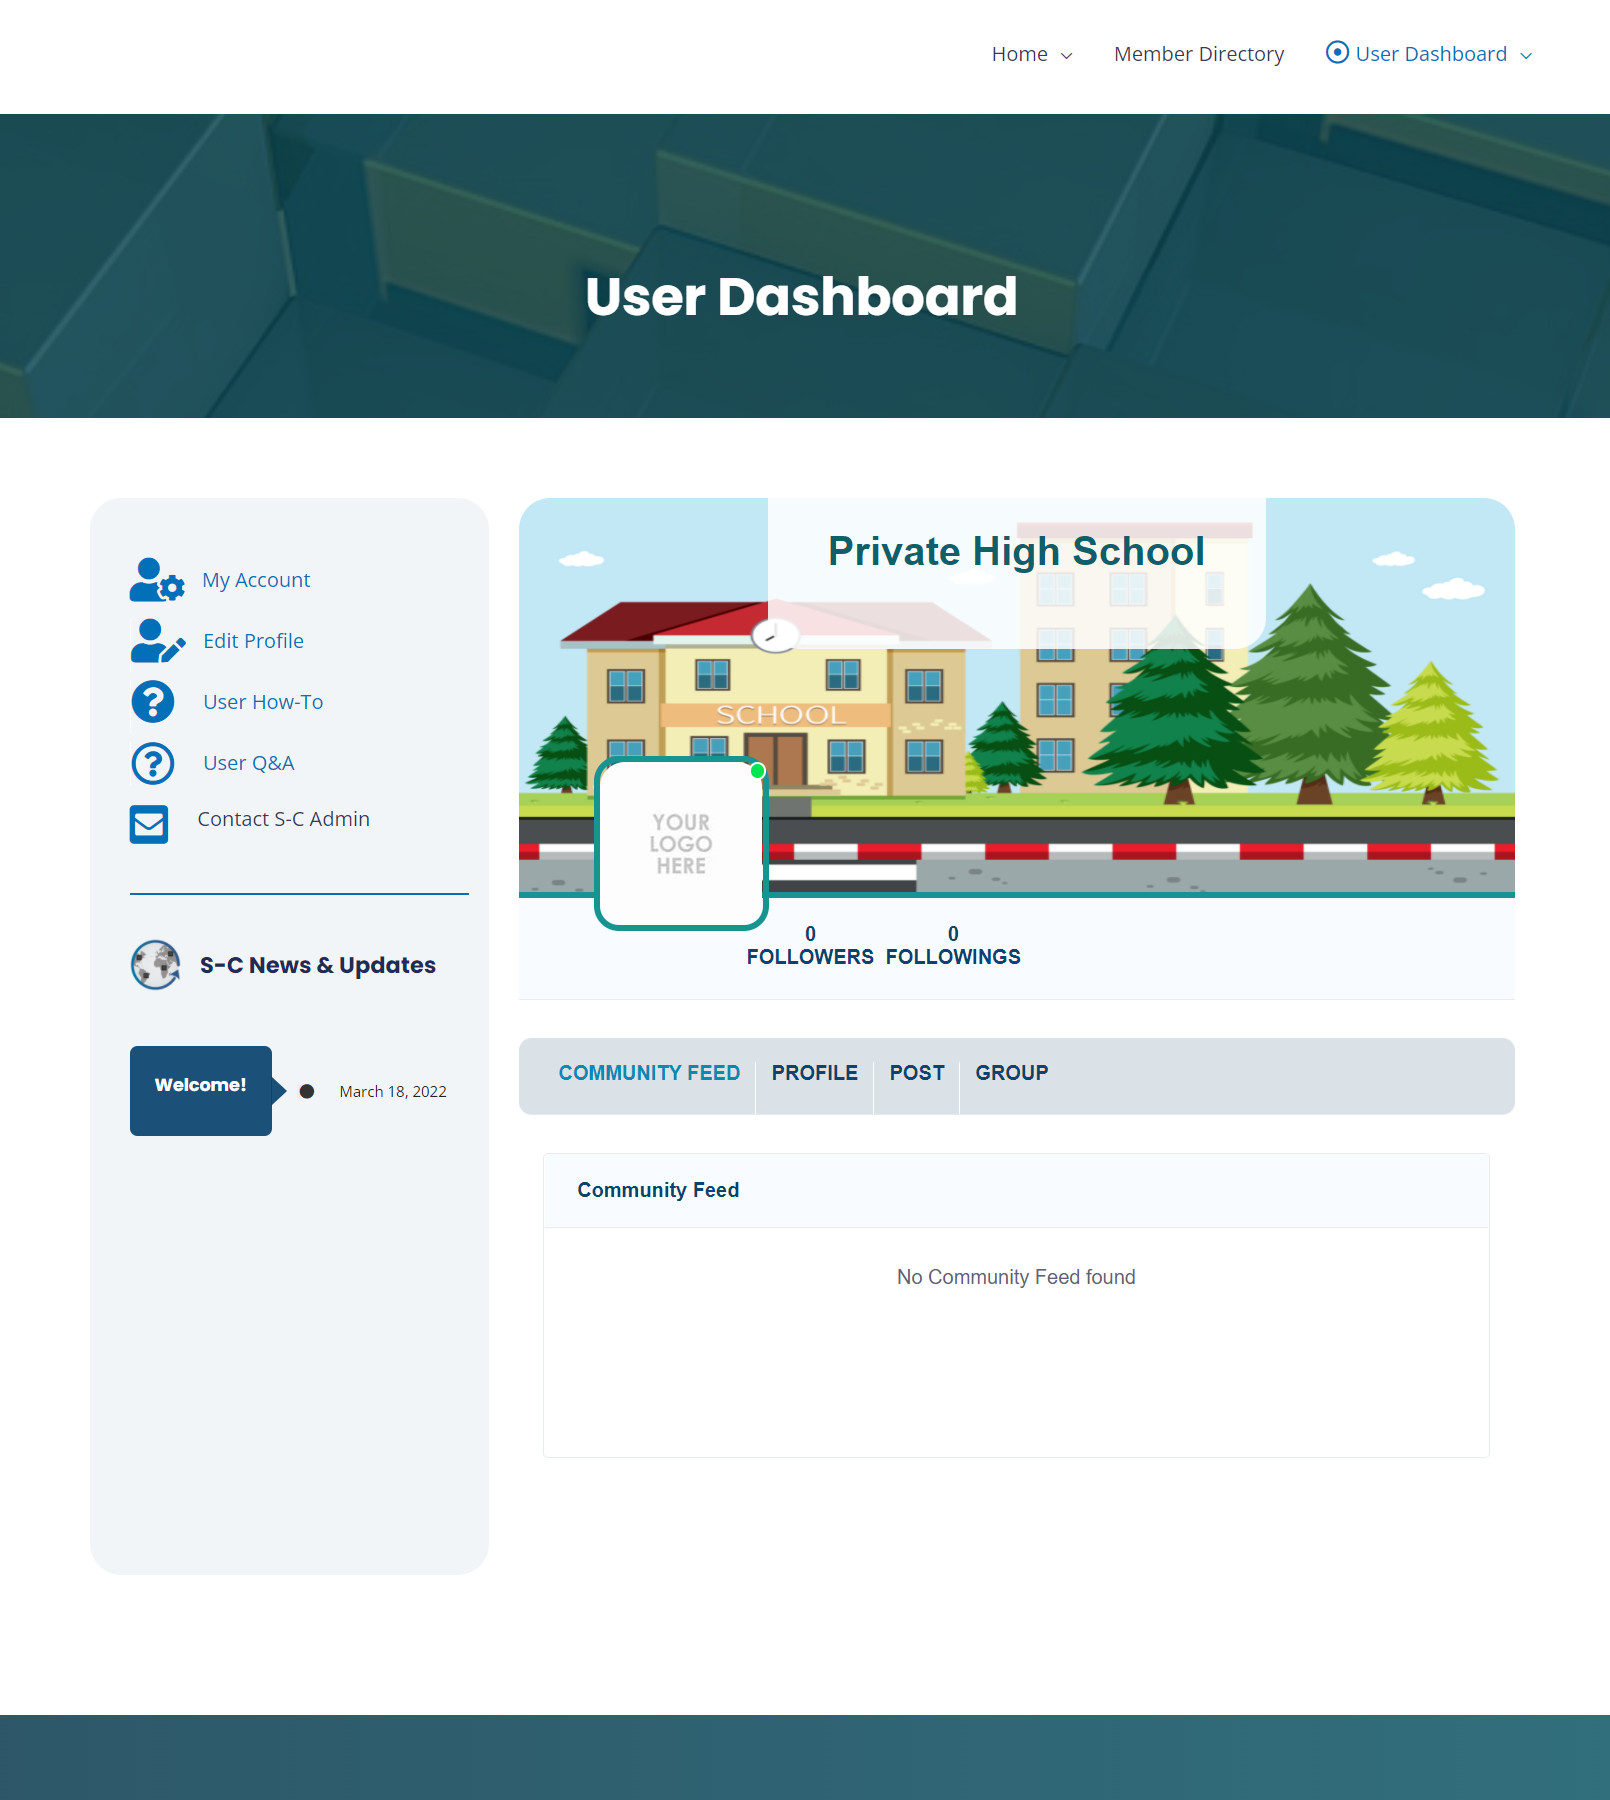
By default, your User Dashboard shows first the Community Feed, which features recent posts from other members.
View Profile
To view your profile from the User Dashboard, click on the “Profile” tab next to “Community Feed.” The view will toggle over, and you will now see your profile as it appears to members at the same level* as you.
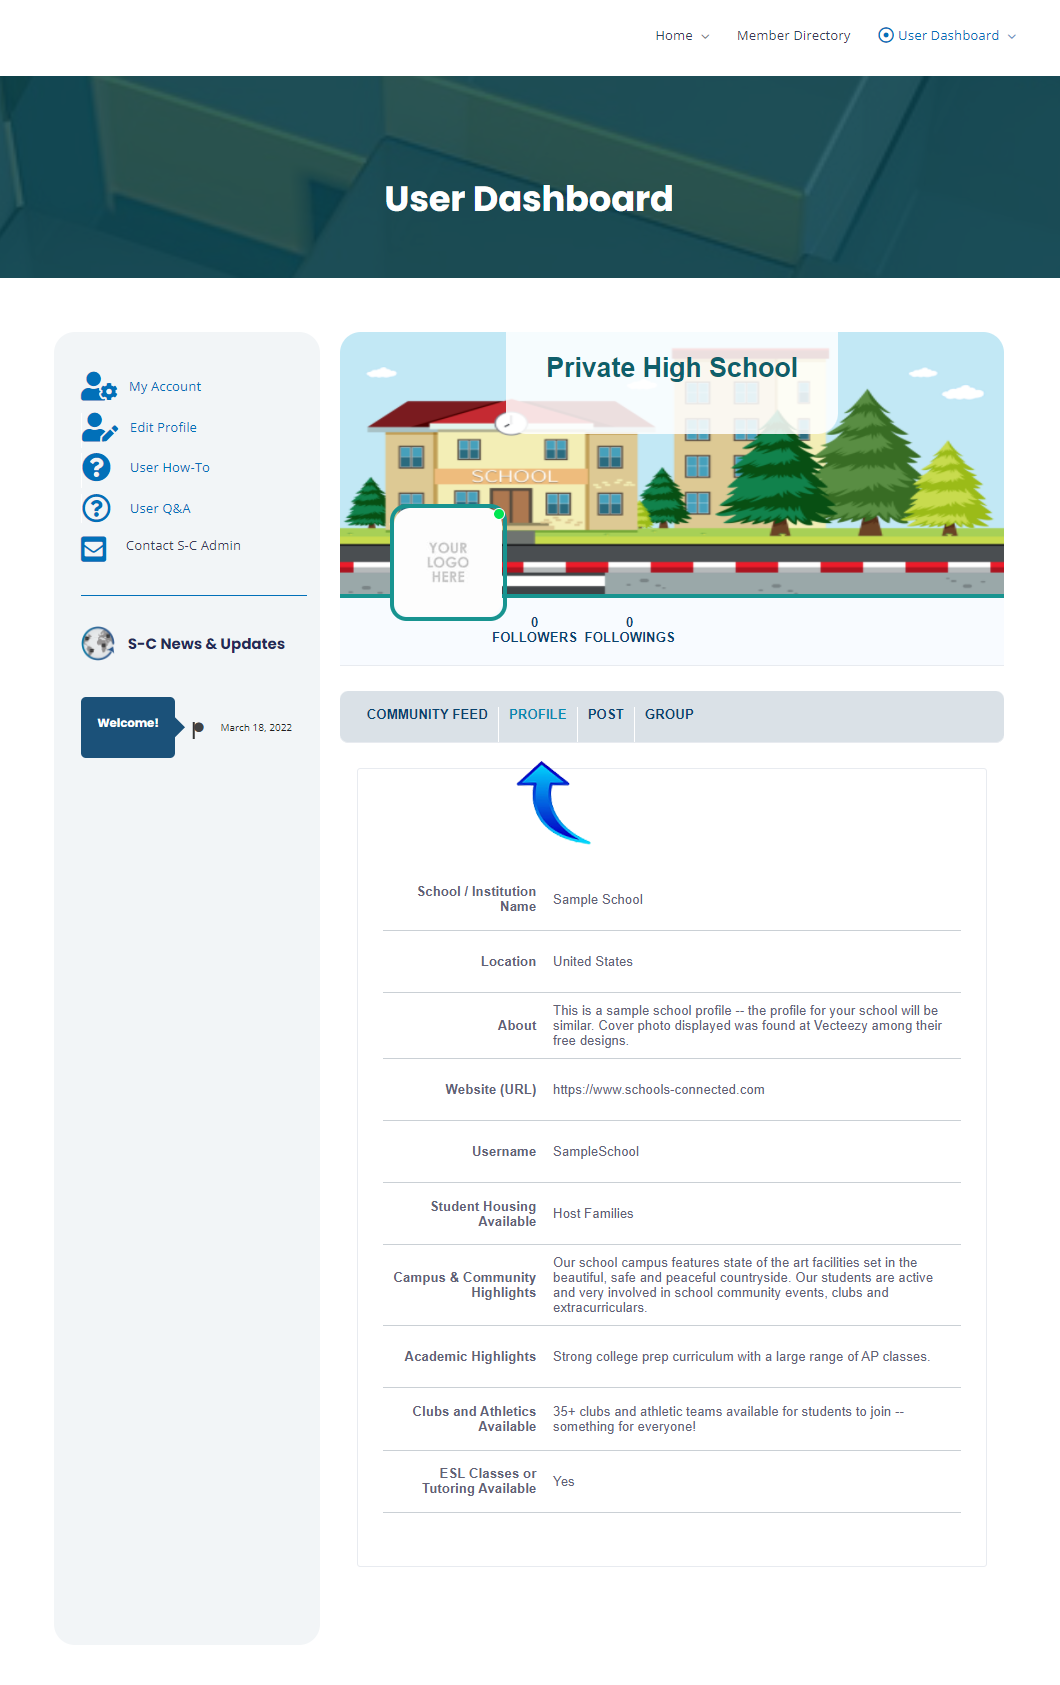
*Lower-level members will not be able to access all of your profile information and will only see the general region where your school/institute is located.
Send a Message
To view your messaging center from the User Dashboard, click on the “Message” tab. The view will toggle over, and you will now see your Message Inbox.
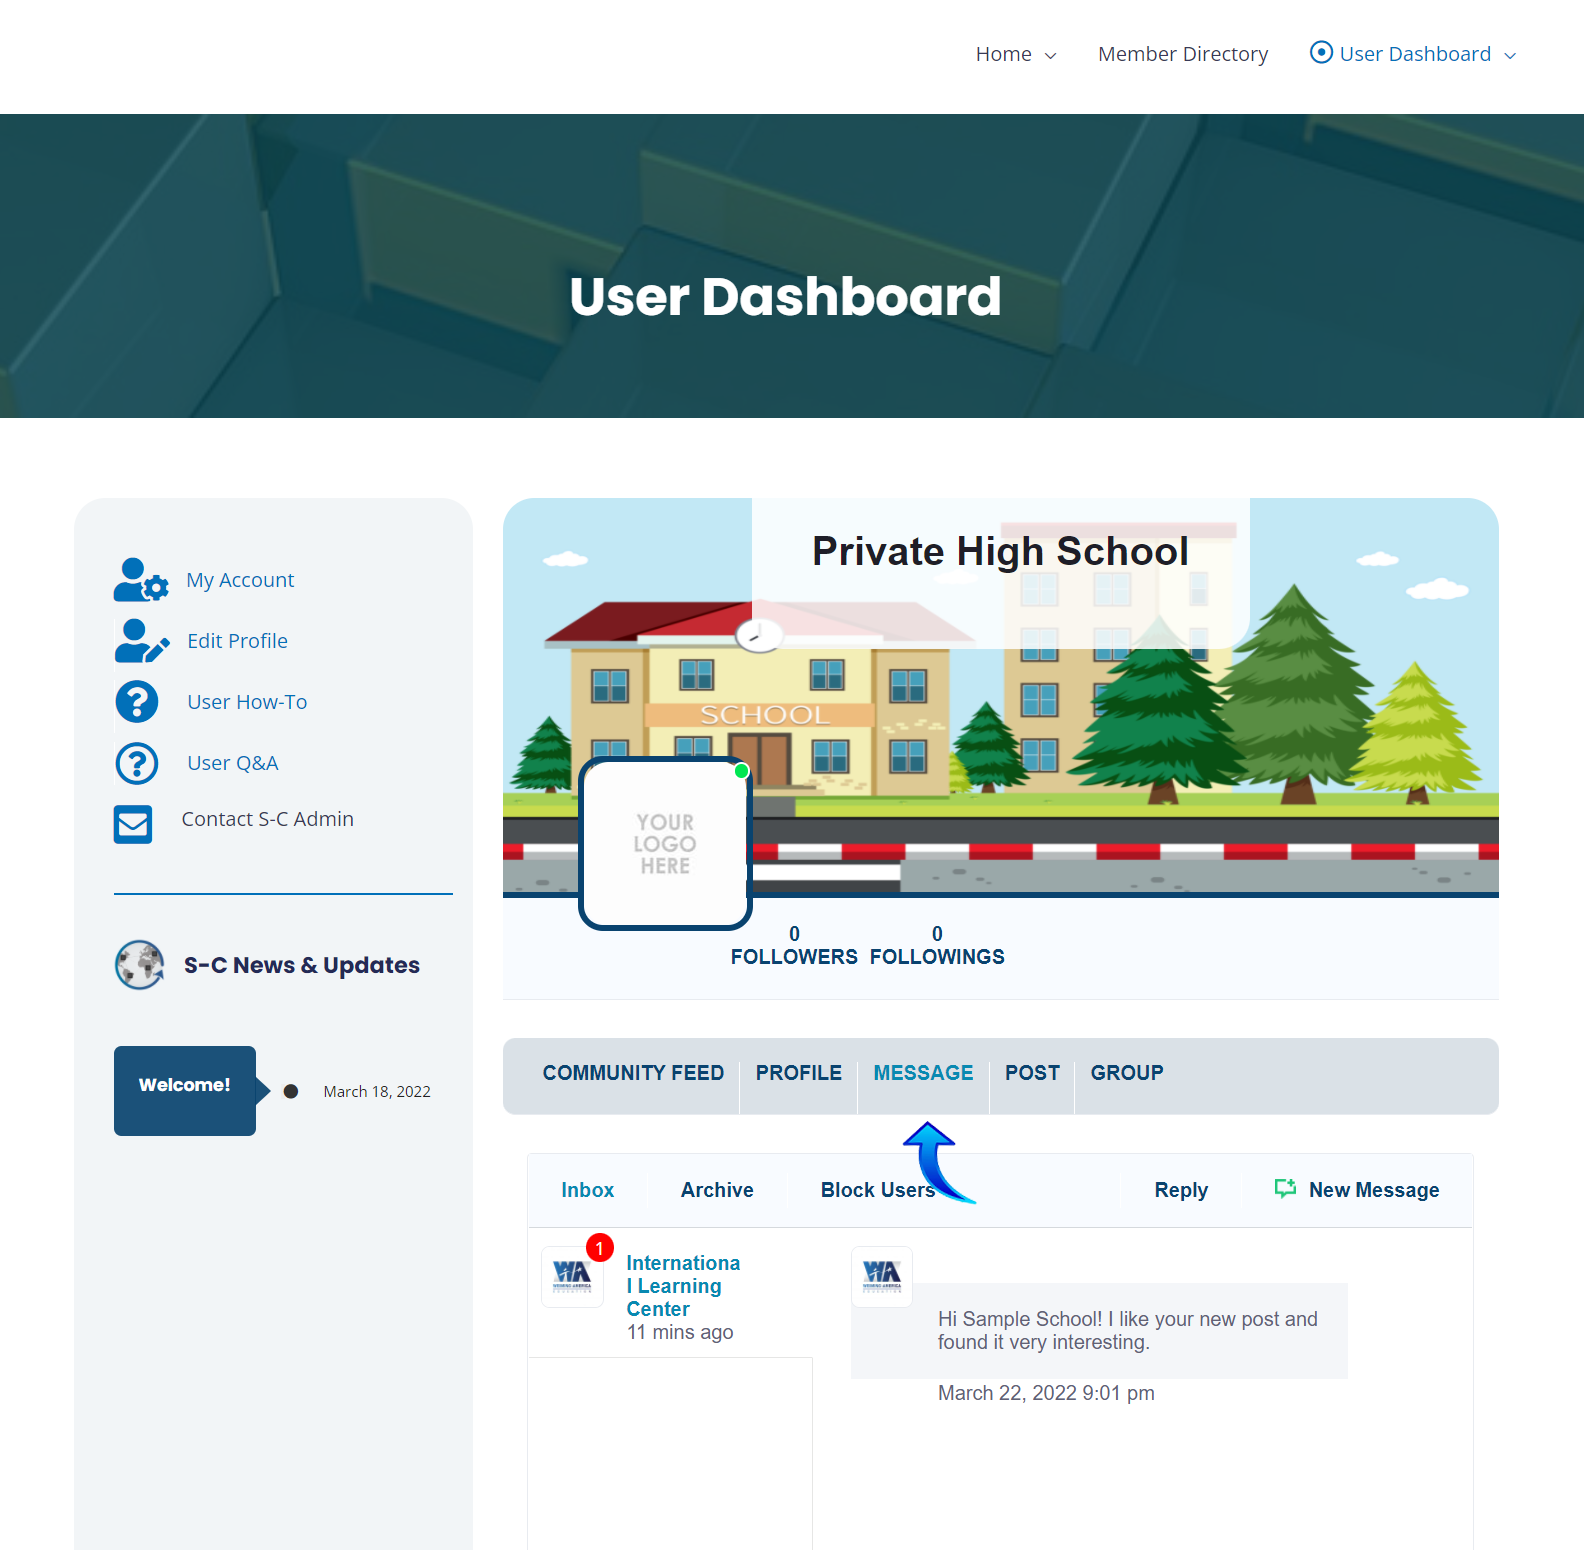
Select “New Message” to create a message for another member. The box below will pop up into view.
You must fill in the username as found within another “Elite” or equivalent member’s profile. If you know a user’s e-mail address as used for their account, you may use that as well.
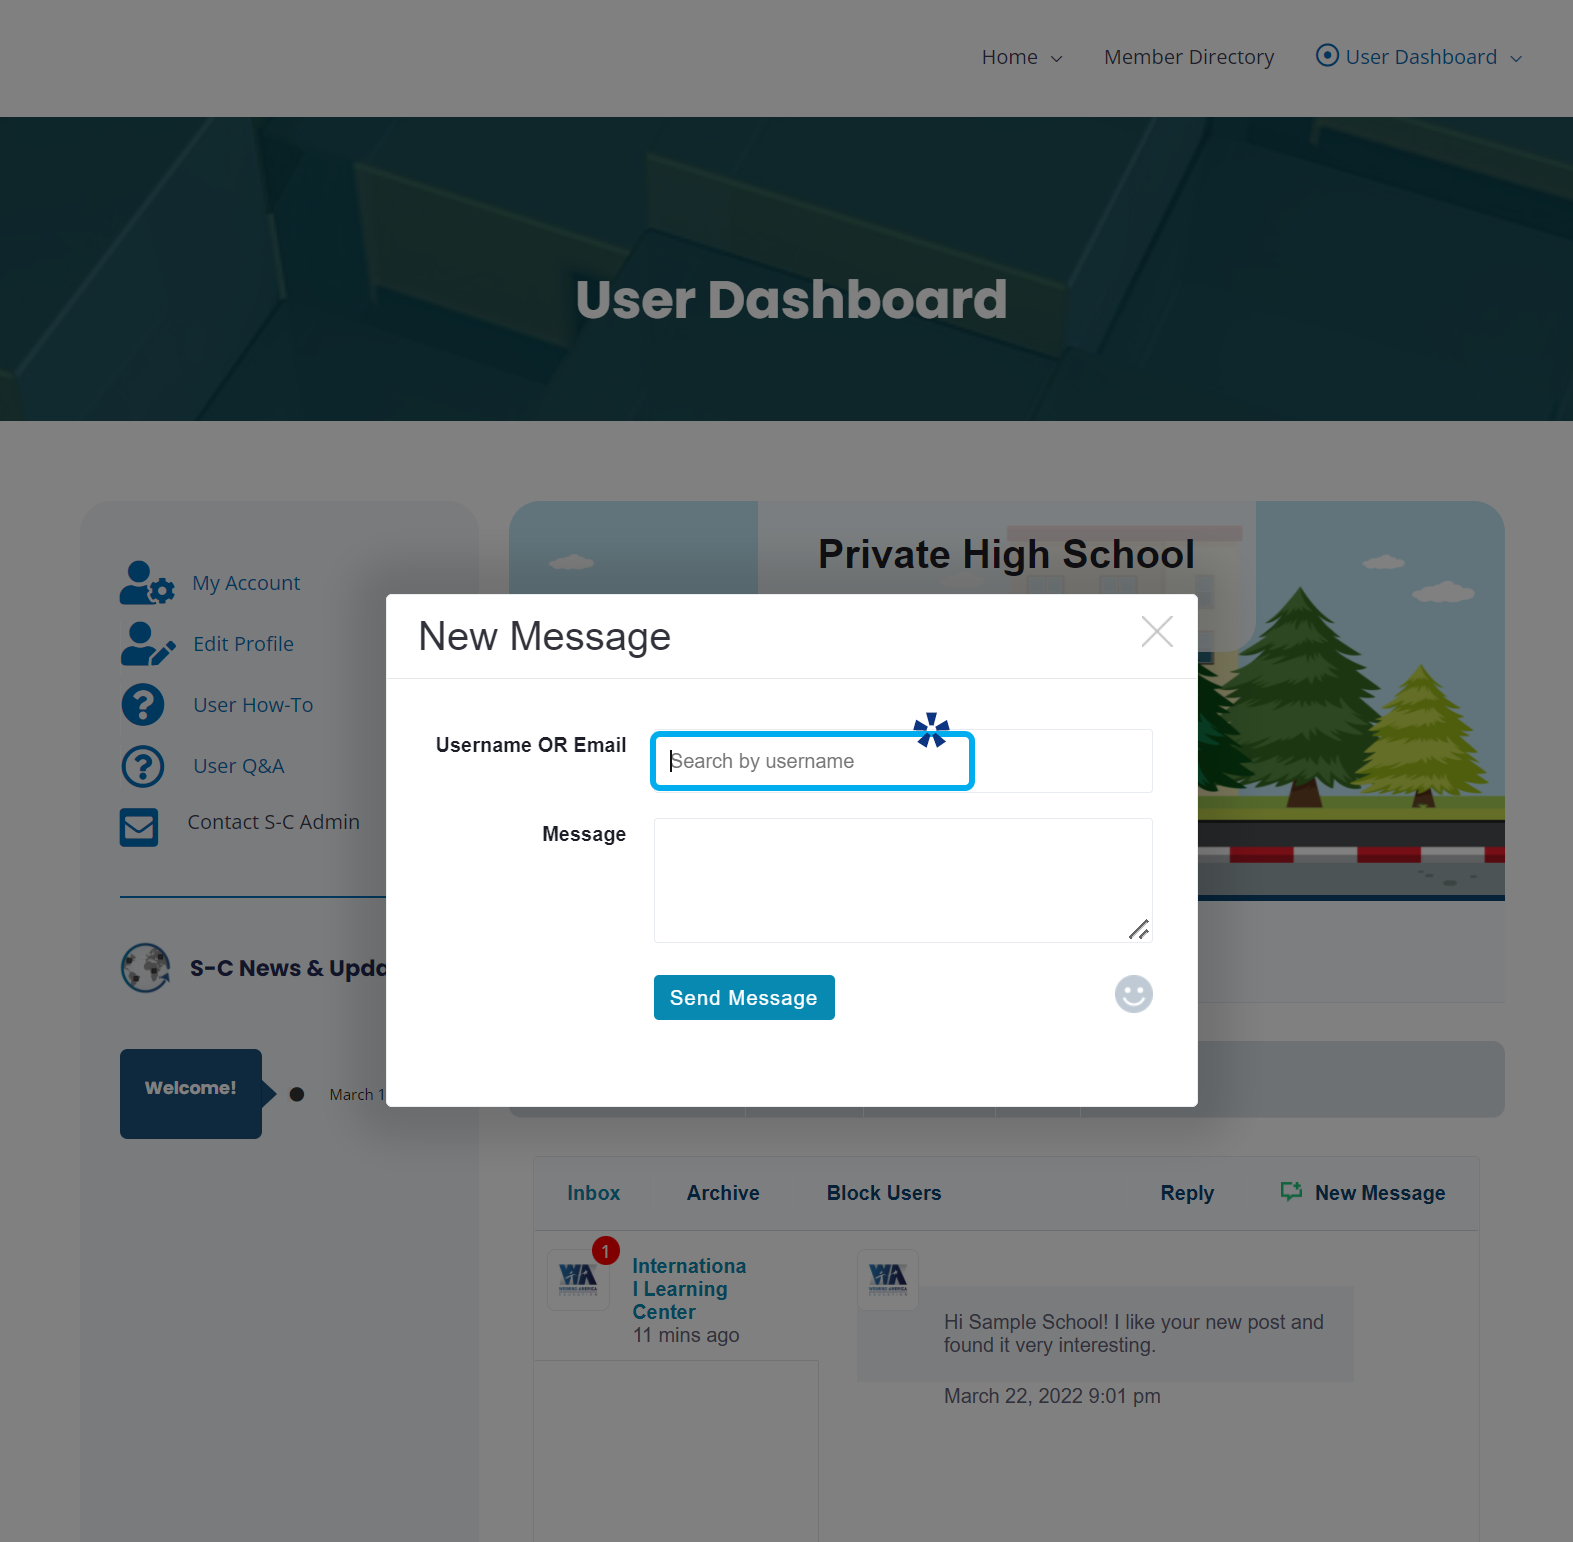
Type in your message and hit “send message.” This thread will now automatically appear in your message center, and you will receive e-mail notification to the registered e-mail upon member reply.
Create a Post
To view your Posts and/or create a new one, click on the “Post” tab. The view will toggle over, and you will now see your previously published posts and the form for creating a new one.
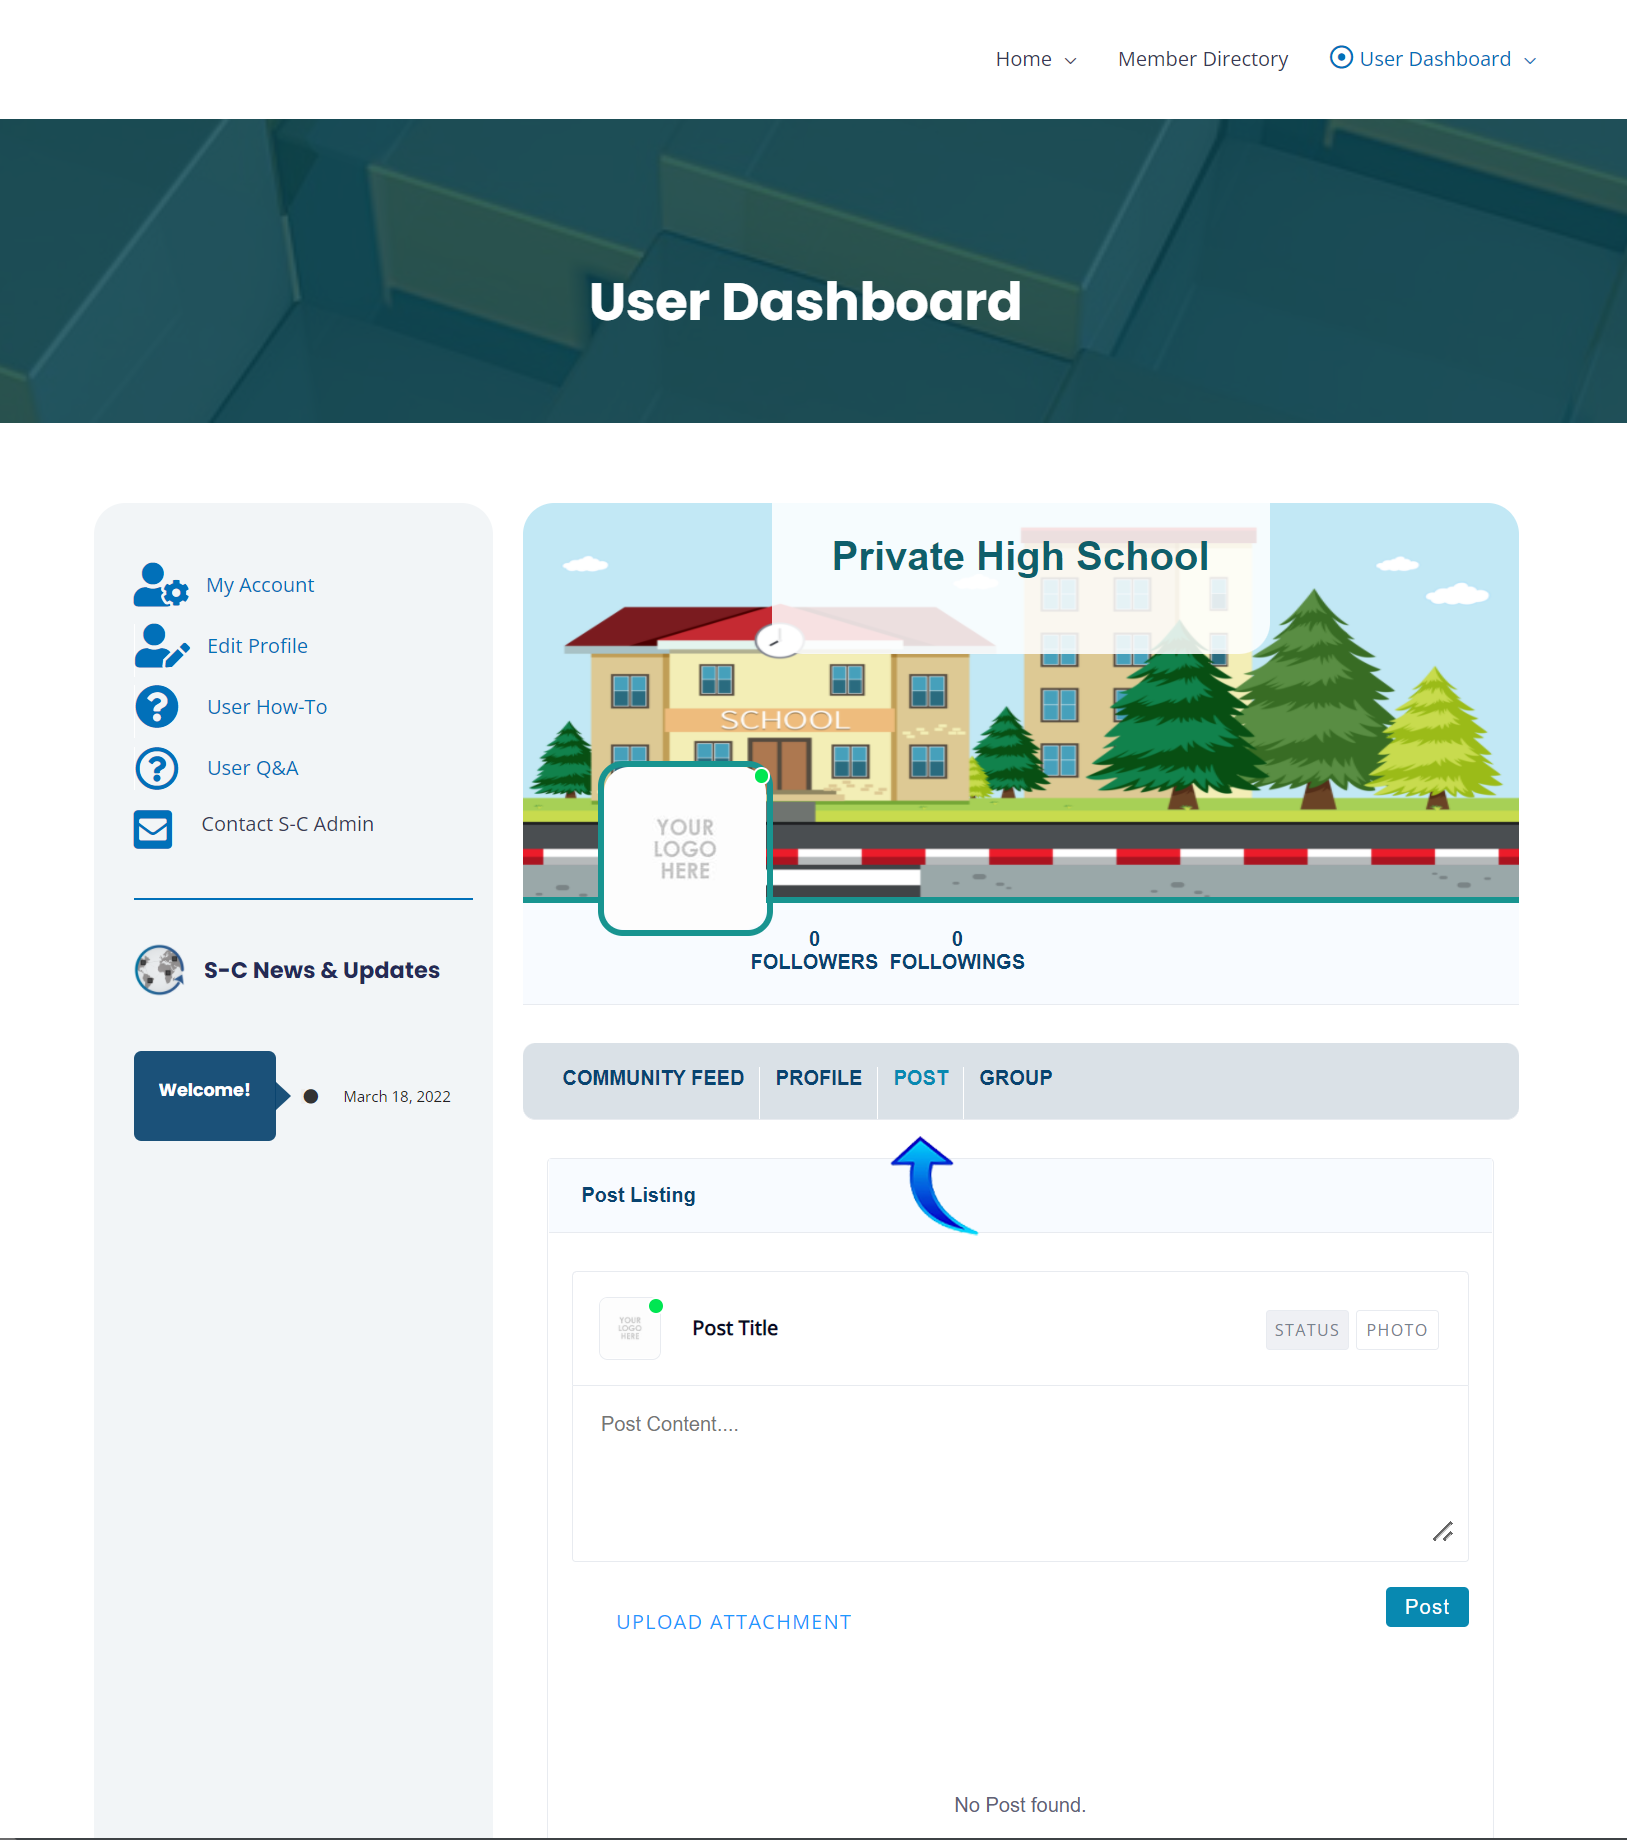
To create a new Photo post, you must input a Post Title. Then, fill in your content and select a photo to upload to the post. Once published, the most recent post will now appear below the Post Listing form.
Taggle the post type to “Status,” aside the Title box, to publish your thoughts without an image.
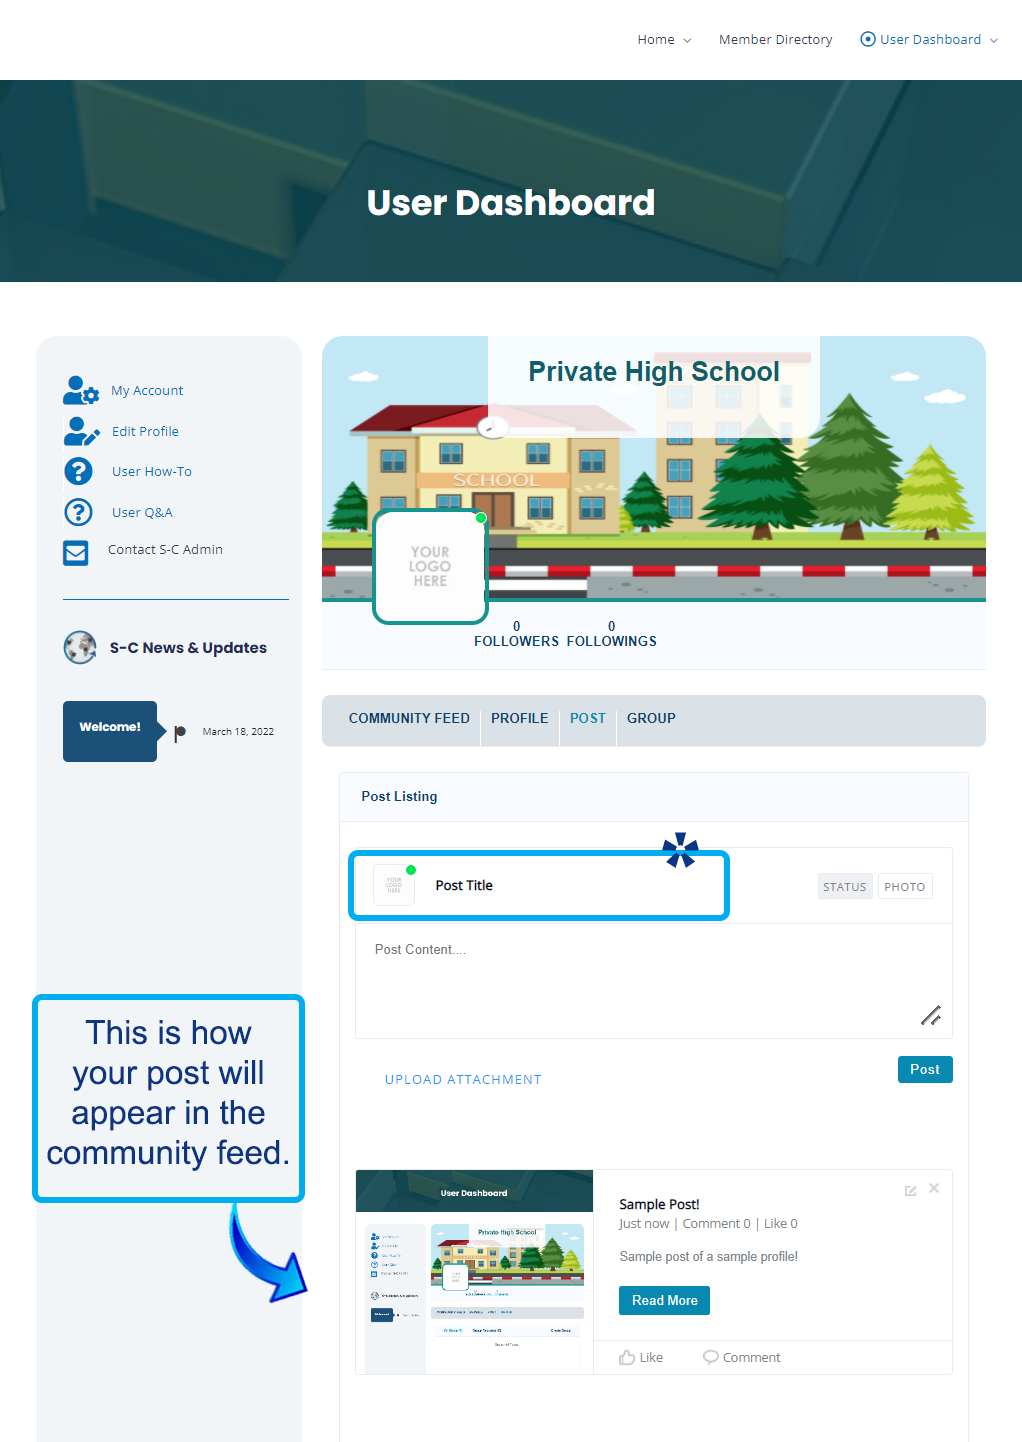
Once successfully created, your post will be live within the community feed and other users will be able to view, like or comment on your content.
Create a Group
To view your Groups and/or create a new one, click on the “Group” tab. The view will toggle over, and you will now see your active groups, “Requests” to join other community groups, and the link for the form to create a new one.
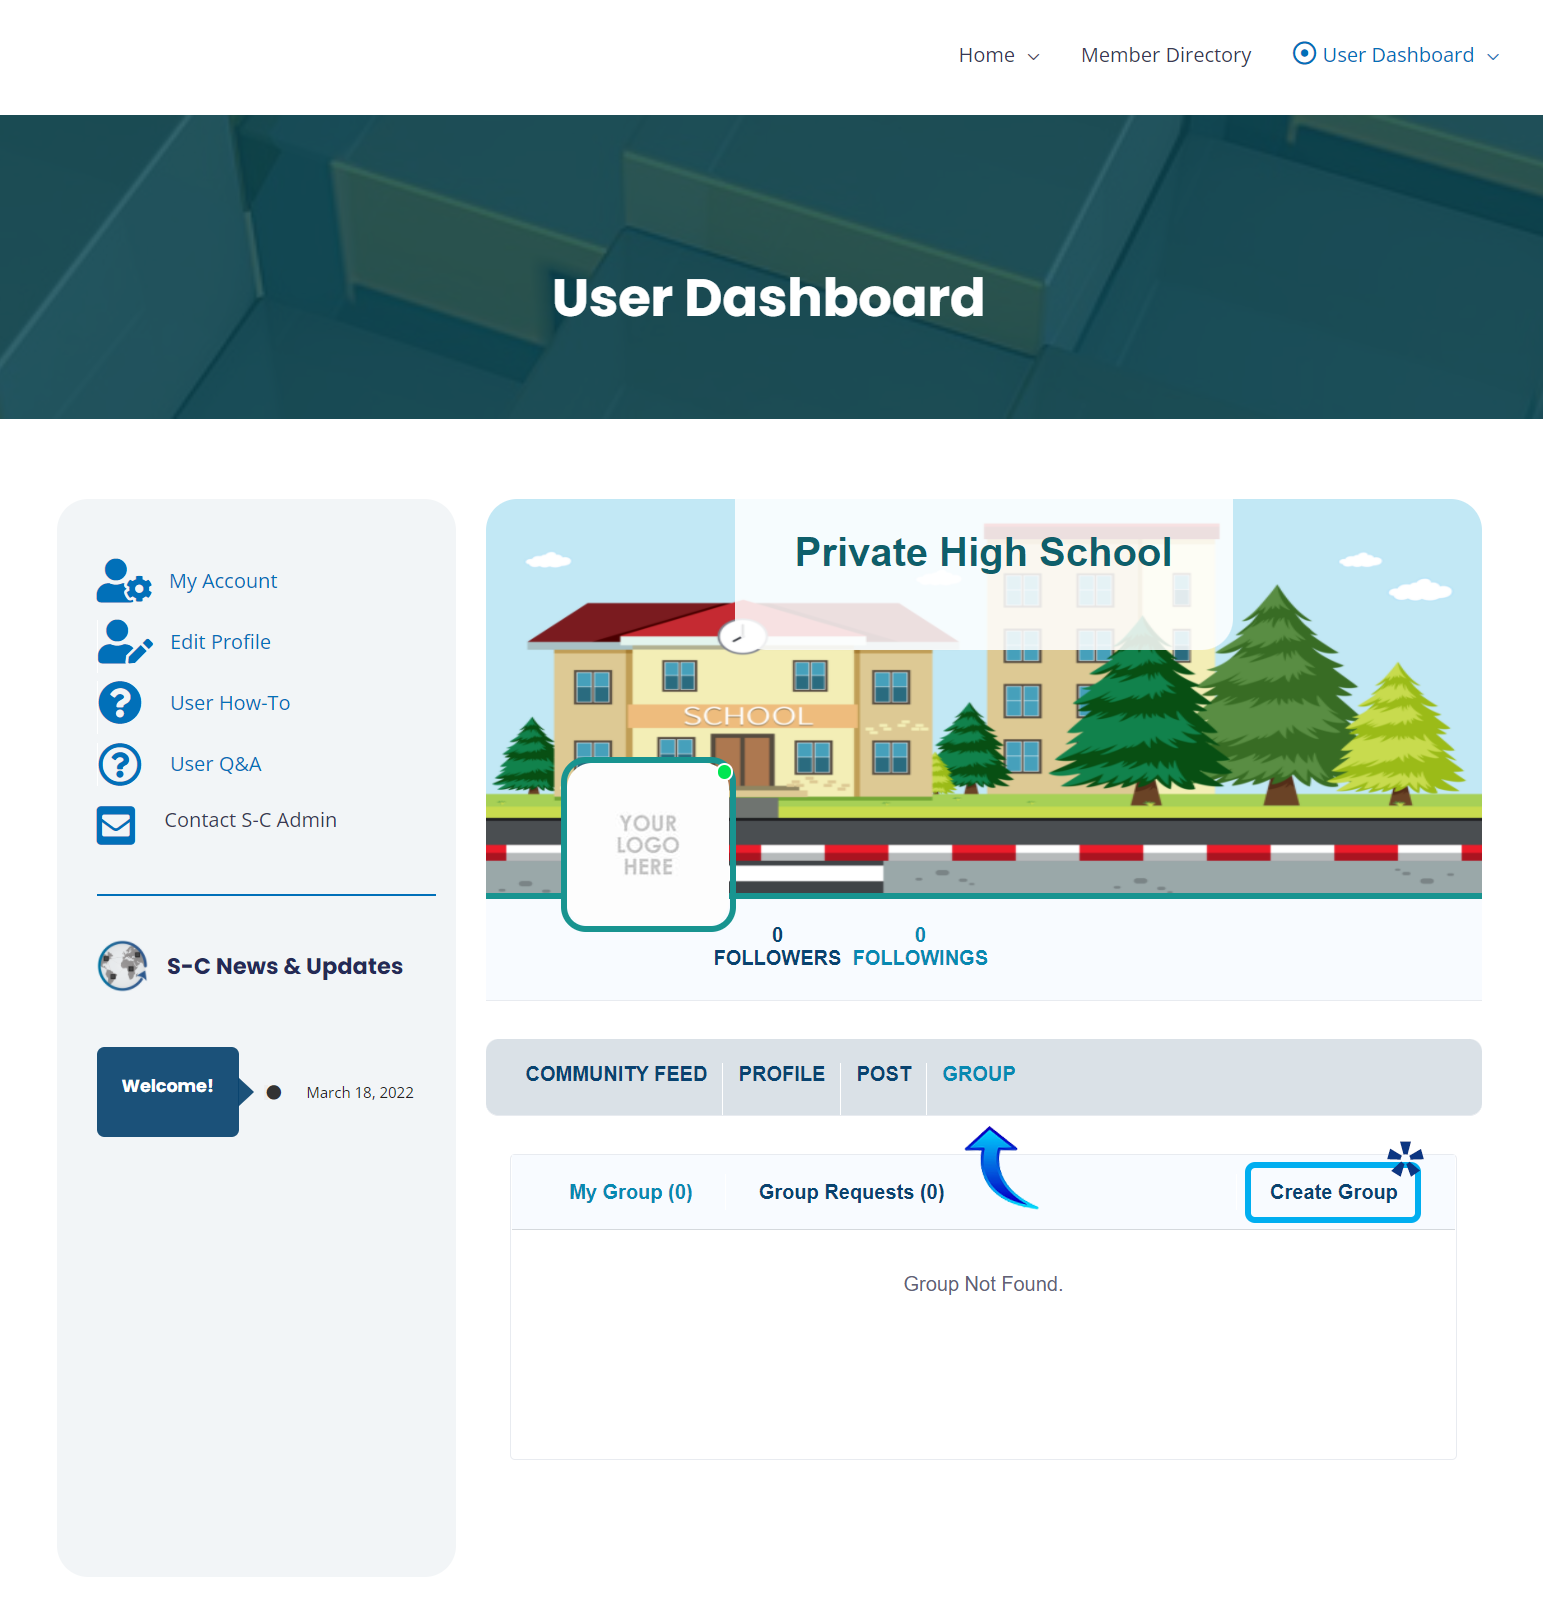
The form to start a new community group, as shown, will appear after selecting “Create Group.”
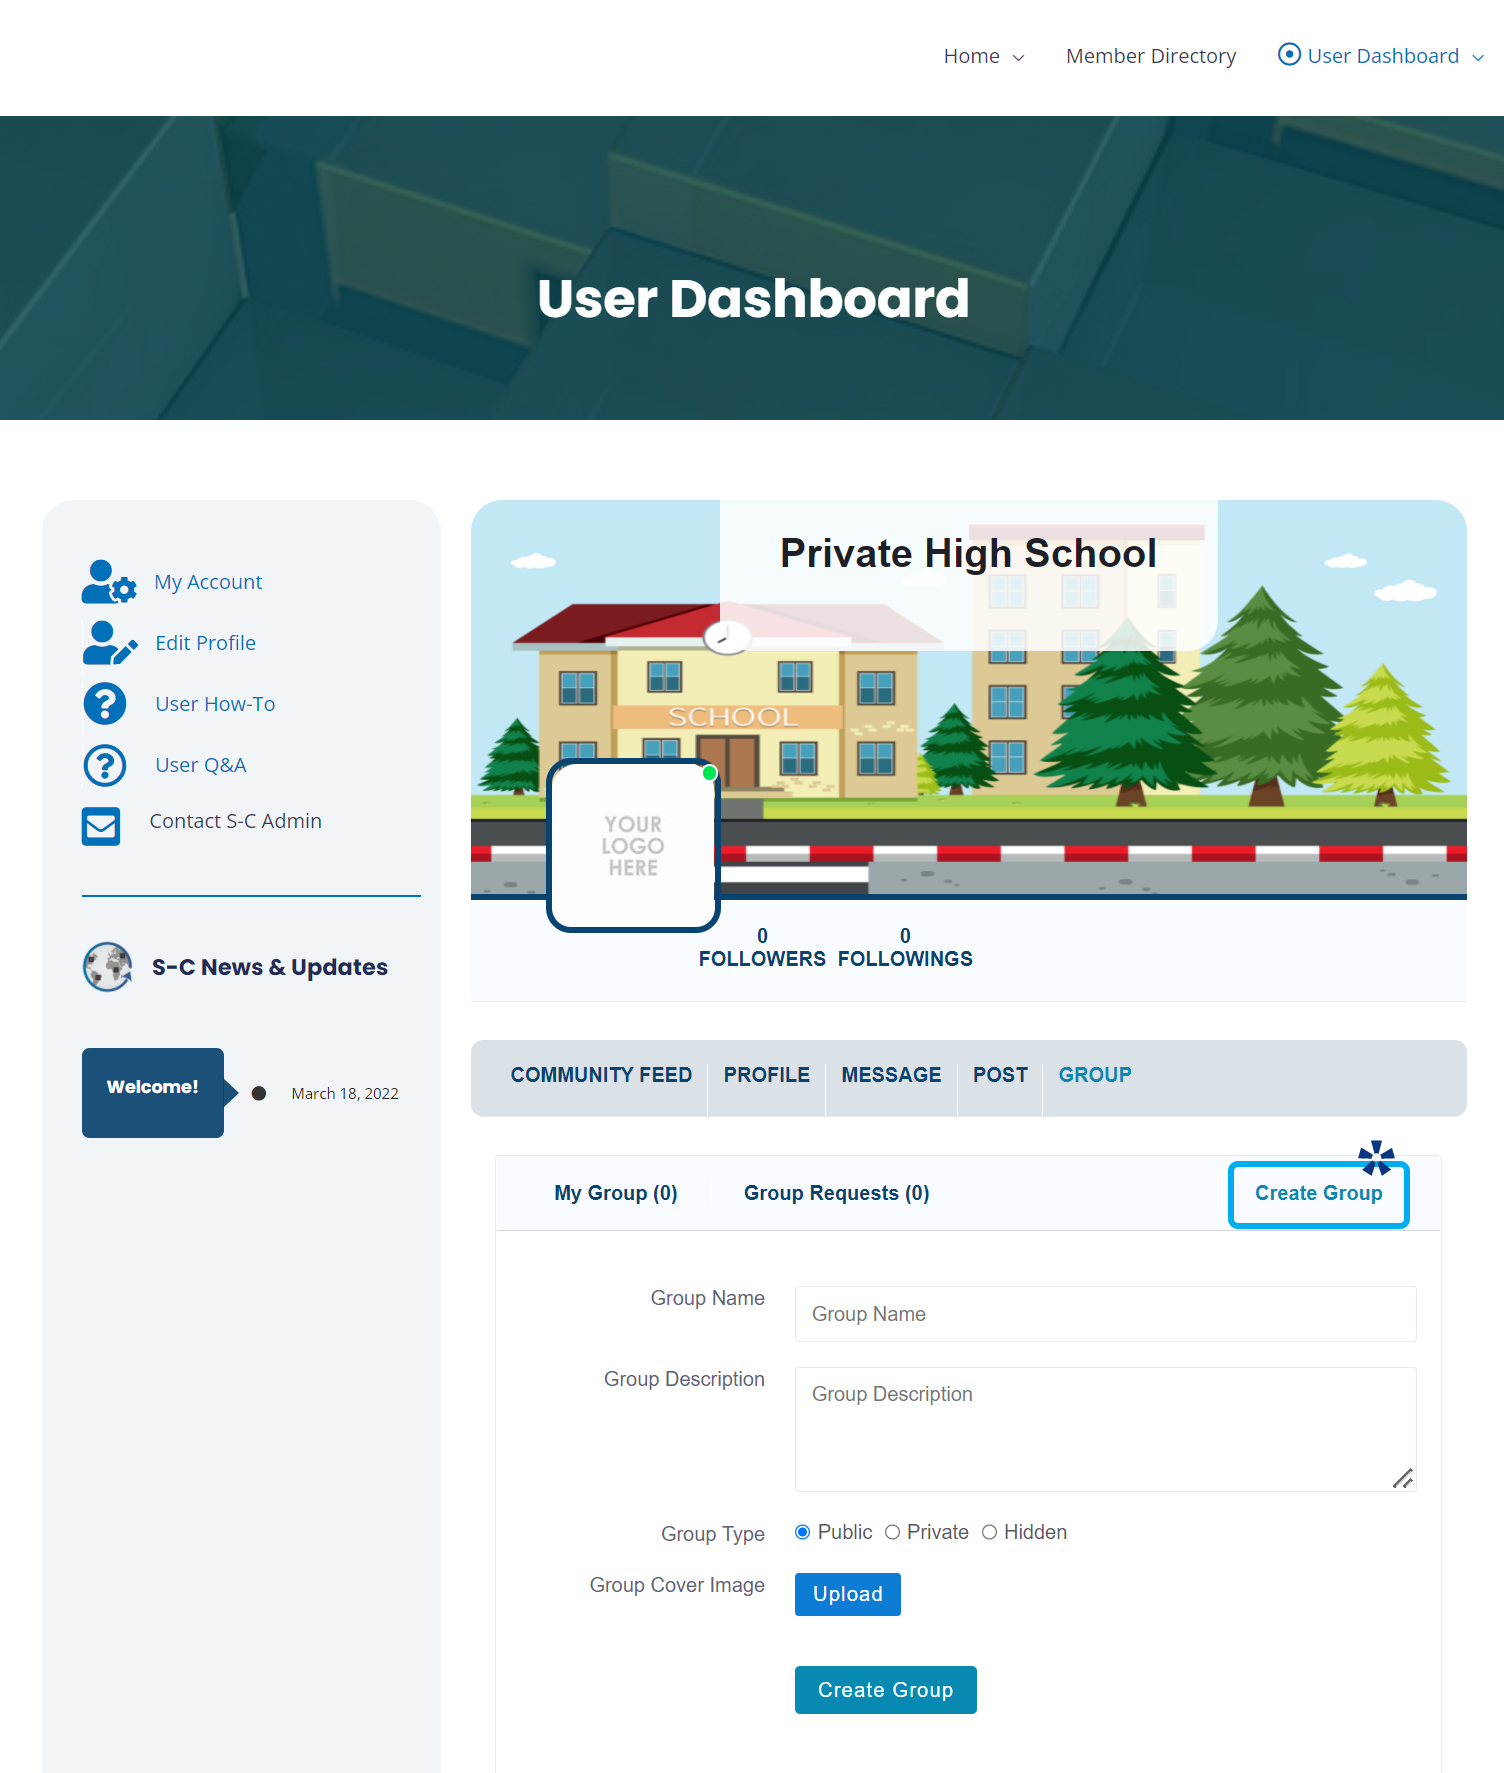
Being as detailed as possible with your Group Name and Description will help other members understand what the group is for and whether they would be interested in joining.
You may also upload a cover image to “style” your group. Hit “create group” and it will now be live and will automatically appear within the “My Groups” tab above.
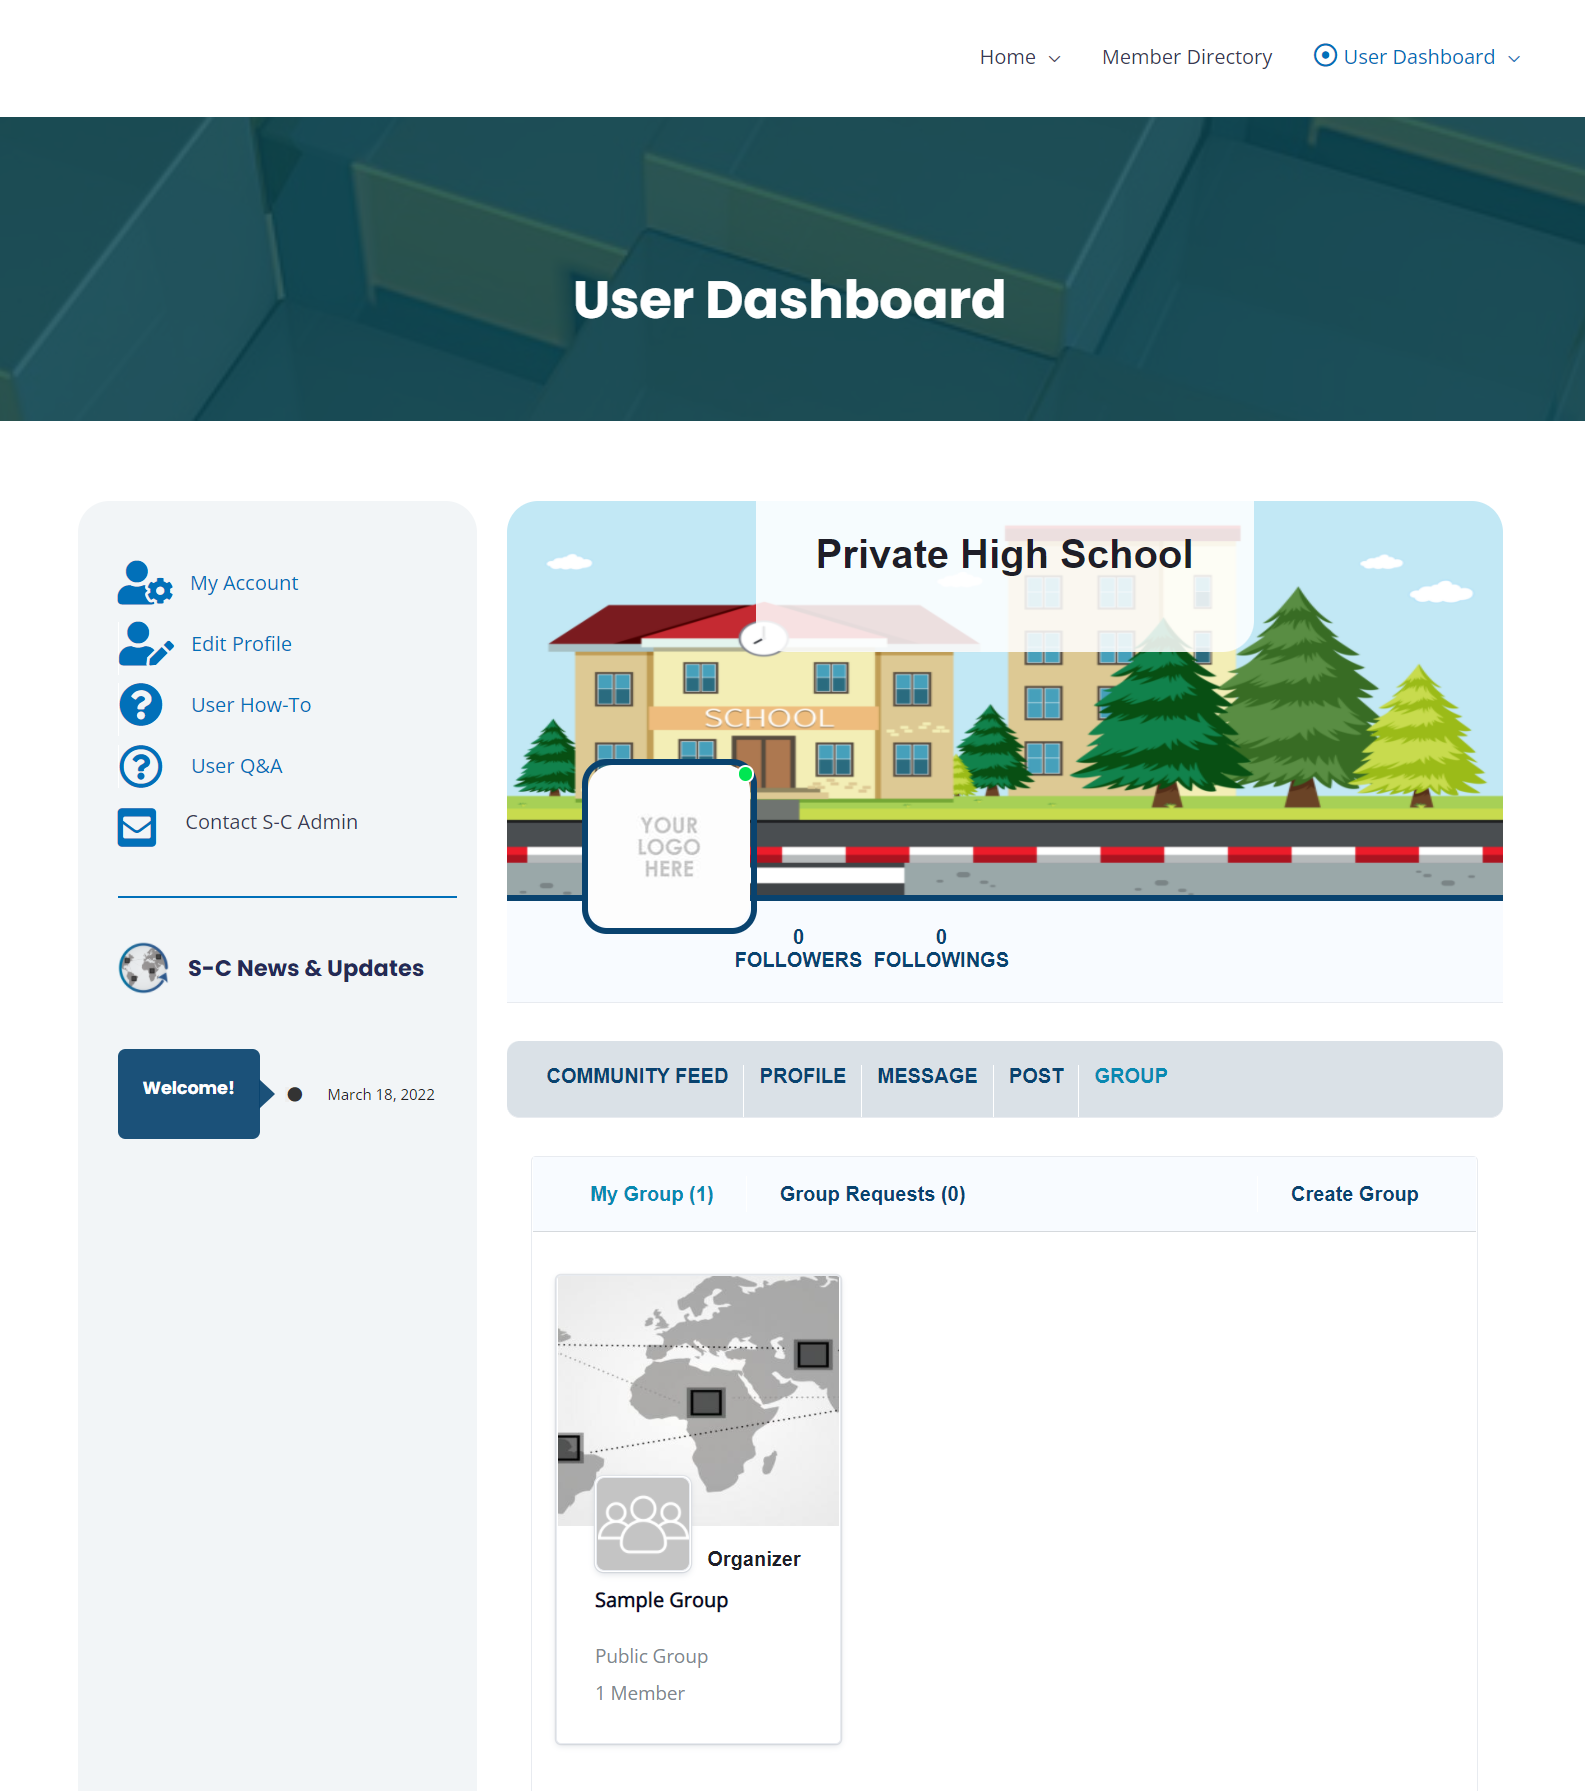
To see how your group will appear to others, set a group “profile” image, or invite members to join, click on your group within the “My Groups” section to open it.
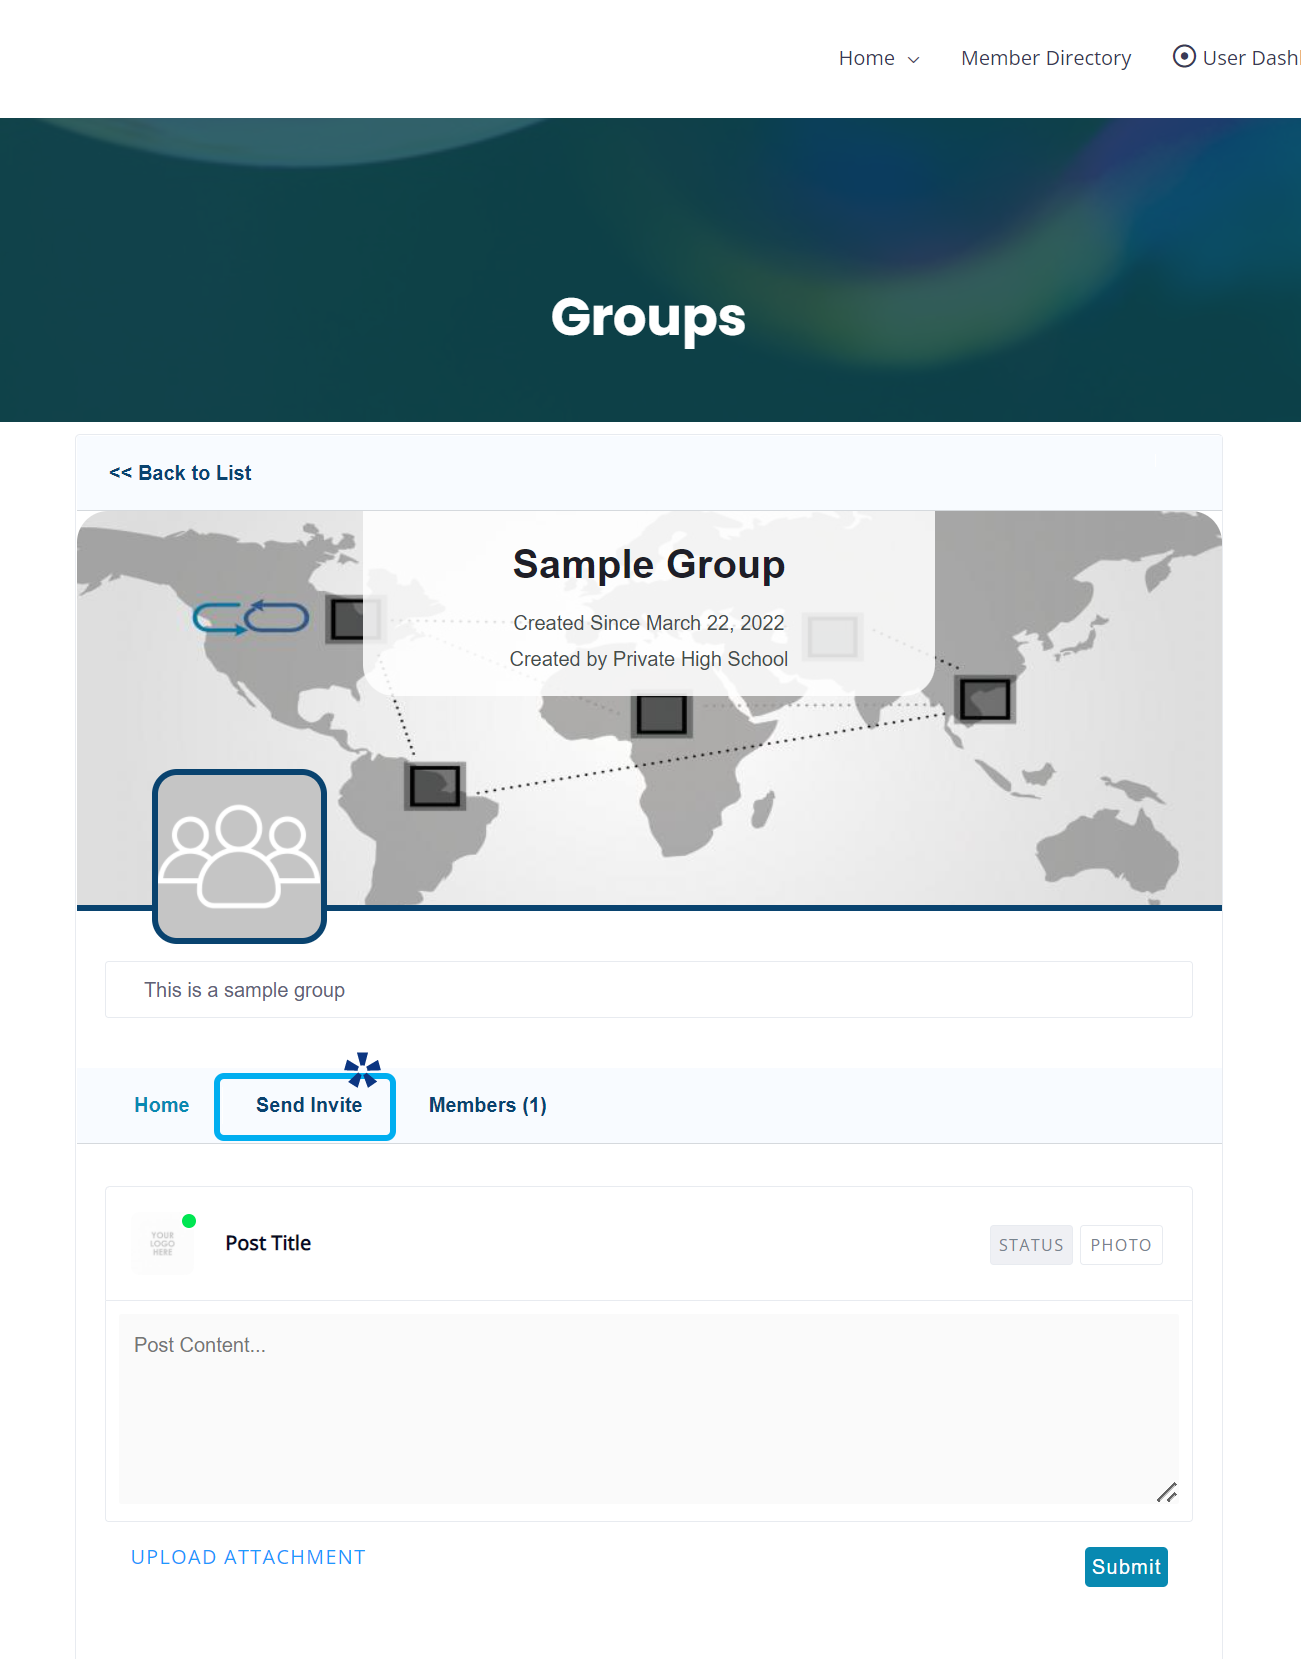
This is your group! You can view members, invite others to join or send posts that are hidden outside of group access. These posts will not appear in the community feed and if your group is set to private, users will not be able to view them within the group unless they are granted access.